
How To Fillet A Walleye – Oh So Easy!
Once we walk you through step by step on how to Fillet a Walleye you will be able to fillet one in less than a minute. This method is so easy to learn, that my 10 year old Grandson was able to do a good job after just a few trials (Walleyes).
The end result; a fillet with no skin or bones, ready to cook and eat. No more worries of the kids getting bones in their throat.
Tip- There are some very small bones just above the rib-cage crest that you will want to remove. We will show you how to do this, and it’s so easy.
Tip- The best part of the Walleye is a piece of meat I call the Walleye Scallop. See how to remove this in our video below.
Tip- Best Spring Bluegill Bait, get is here!
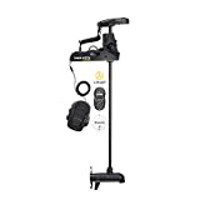
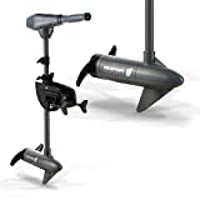
See the Top Bow Mount Trolling Motors for fishing.
Step 1
If you are just learning on how to Fillet, start with a sharp knife. It will make a big difference, making the filleting much easier and quicker. The results will also look much better and you will be pleased.
With a little practice and a good knife you will be able to fillet a Walleye or any pan-fish in less than a minute.
Step 2
The first step is to place your knife under the Pectoral Fin and make a cut from the bottom of the gills to the top of the head. Your cut should angle across the fish at at approximately 45 degrees. The video will show this for you.
Step 3
Now for this next step, take your knife and start at the top of the head, where the cut from Step 2 was made, point your knife toward the opposite side of the tail and make a cut all the way down the back to the tail. Your knife should ride over the center fishbone (backbone) and just above the Dorsal Fin. The depth of your cut should be anywhere from 1″ to 2″ deep.
Step 4
Now starting at the bottom of the Dorsal Fin, start making a full length cut up to the head. On each pass/cut from the bottom of the Dorsal Fin to the top of the head cut approximately 1/2″ deep. This depth is not critical and a sharp knife will make deeper cuts much easier. Now work your passes up over the rib-cage toward the head and proceeding down to the belly. Once you have finished filleting the meat off the rib-cage continue to cut along the center fishbone, all the way down to the tail.
Tip- Do Not cut the fillet off the fish, leave it attached to the tail, as this will make removing the skin (skinning) much easier.
*Note, when making your cuts over the rib-cage and down the center bone (fishbone) you will hear and feel the bones, that is a good sound as you know you’re getting all the meat. If you cut through part of the rib bones (cage), Keep going and remove them after you have the fillet separated from the skin.
Step 5
Now flip the Walleye Fillet, with the skin on it, over the tail. Place your fillet knife as close as you can to the tail, at a 45 degree angle, and make a slice through the meat to the skin. Now just slice/skin the fillet off the skin by making horizontal cuts back and forth, working down the fillet, until the fillet has been fully removed. Now you have a piece of meat (Fillet) that has only those small bones that were just above the rib-cage’s highest peak or crest. No, there is no way to avoid these bones during the filleting process, but don’t worry, removing these bones is easy and fast.
Step 6
Now for removing those bones that were just above the top crest of the rib-cage. Take your finger and feel the bones right where the thickest part of the meat transitions to the thinnest part or belly meat. Make a thin cut on both sides of these bones, straight down through the meat, as they are straight up and down. Remove this small thin strip of meat with the bones and toss it. You now have an incredible Walleye Fillet with no bones or skin.
*Oh So Good!
CATCH IT ALL ON VIDEO NOW.

