
How To Mount Your Own Deer Antlers
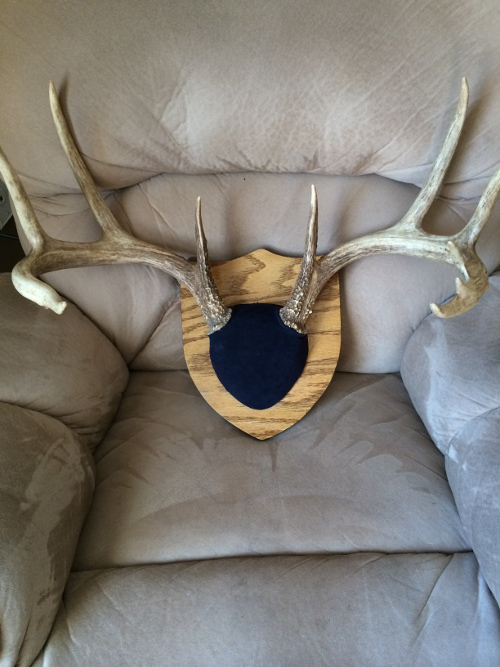
Mounting your own Deer Antlers is very easy, fun, looks great (better than kits you can buy), and is much cheaper than kits or having someone else do it for you. However, if you are looking for a profession experience then please use a taxidermy. Here are a few I have done.

Step by Step Guide on how to mount Deer Antlers
This method of mounting your own deer antlers will take you approximately a week to complete depending on drying times. However, it will be much less expensive than a kit and look much better.
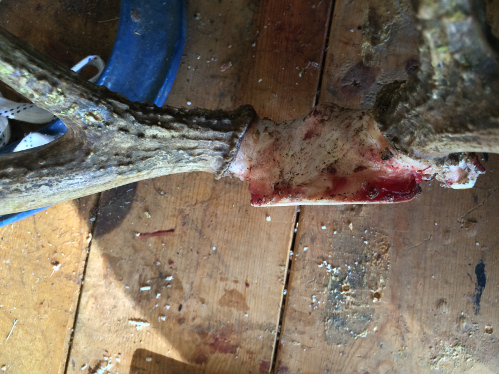
Step 1 – Cutting your Deer Antlers.
I find that a Reciprocating saw works great for this. You will make a cut in front of the antlers down half way through the skull, and behind the antlers intersecting the first cut. Make sure to leave a little gap behind the antlers, as you want some distance (1/2″ to 3/4″) between your board mount and the back of your antlers. Not to worry if you don’t, you can always add cardboard under the backside of the antlers, between the skull and the board, to increase space. I will also use a jig saw to take off any sharp edges or to square of the front of the skull.

Step 2 – Creating A Deer Antler Mounting Board:
I prefer oak or something with oak veneer, as I like the grain structure. However, pine, cheery or any other type of wood will also work. The boards I have are cut out of an old fire place cabinet that had oak veneer over particleboard. I also have saved some pieces from a solid oak dresser that I did not want any more. So look around and see what you may have saved or are ready to burn. This wood is great to work with.
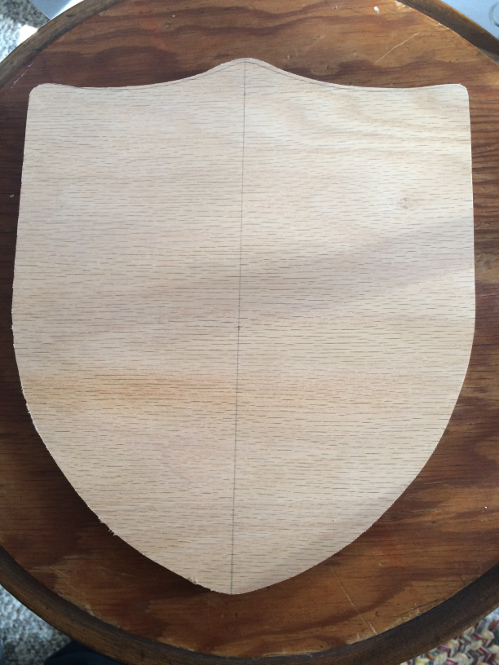
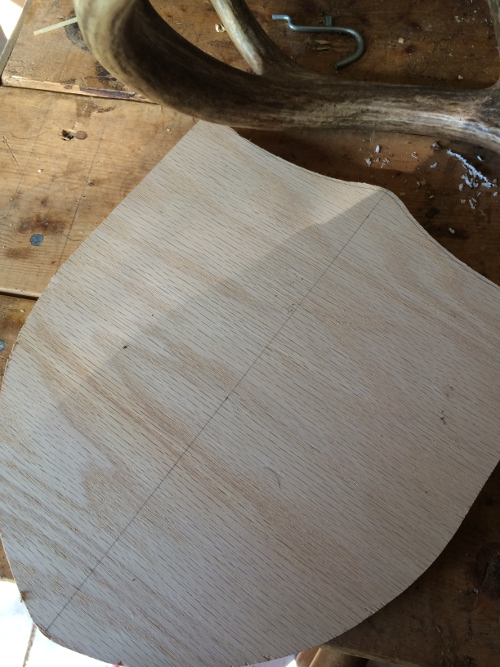
Cut your board pieces 9 inches by 11 inches (the size is up to you, but this is what I use). Then draw a pattern on it, cut it out with a jig saw, and sandy the edges smooth.
Here is a pattern I use and you can see the pencil marks to make sure the top point and bottom point are aligned.
Aligning the Antlers
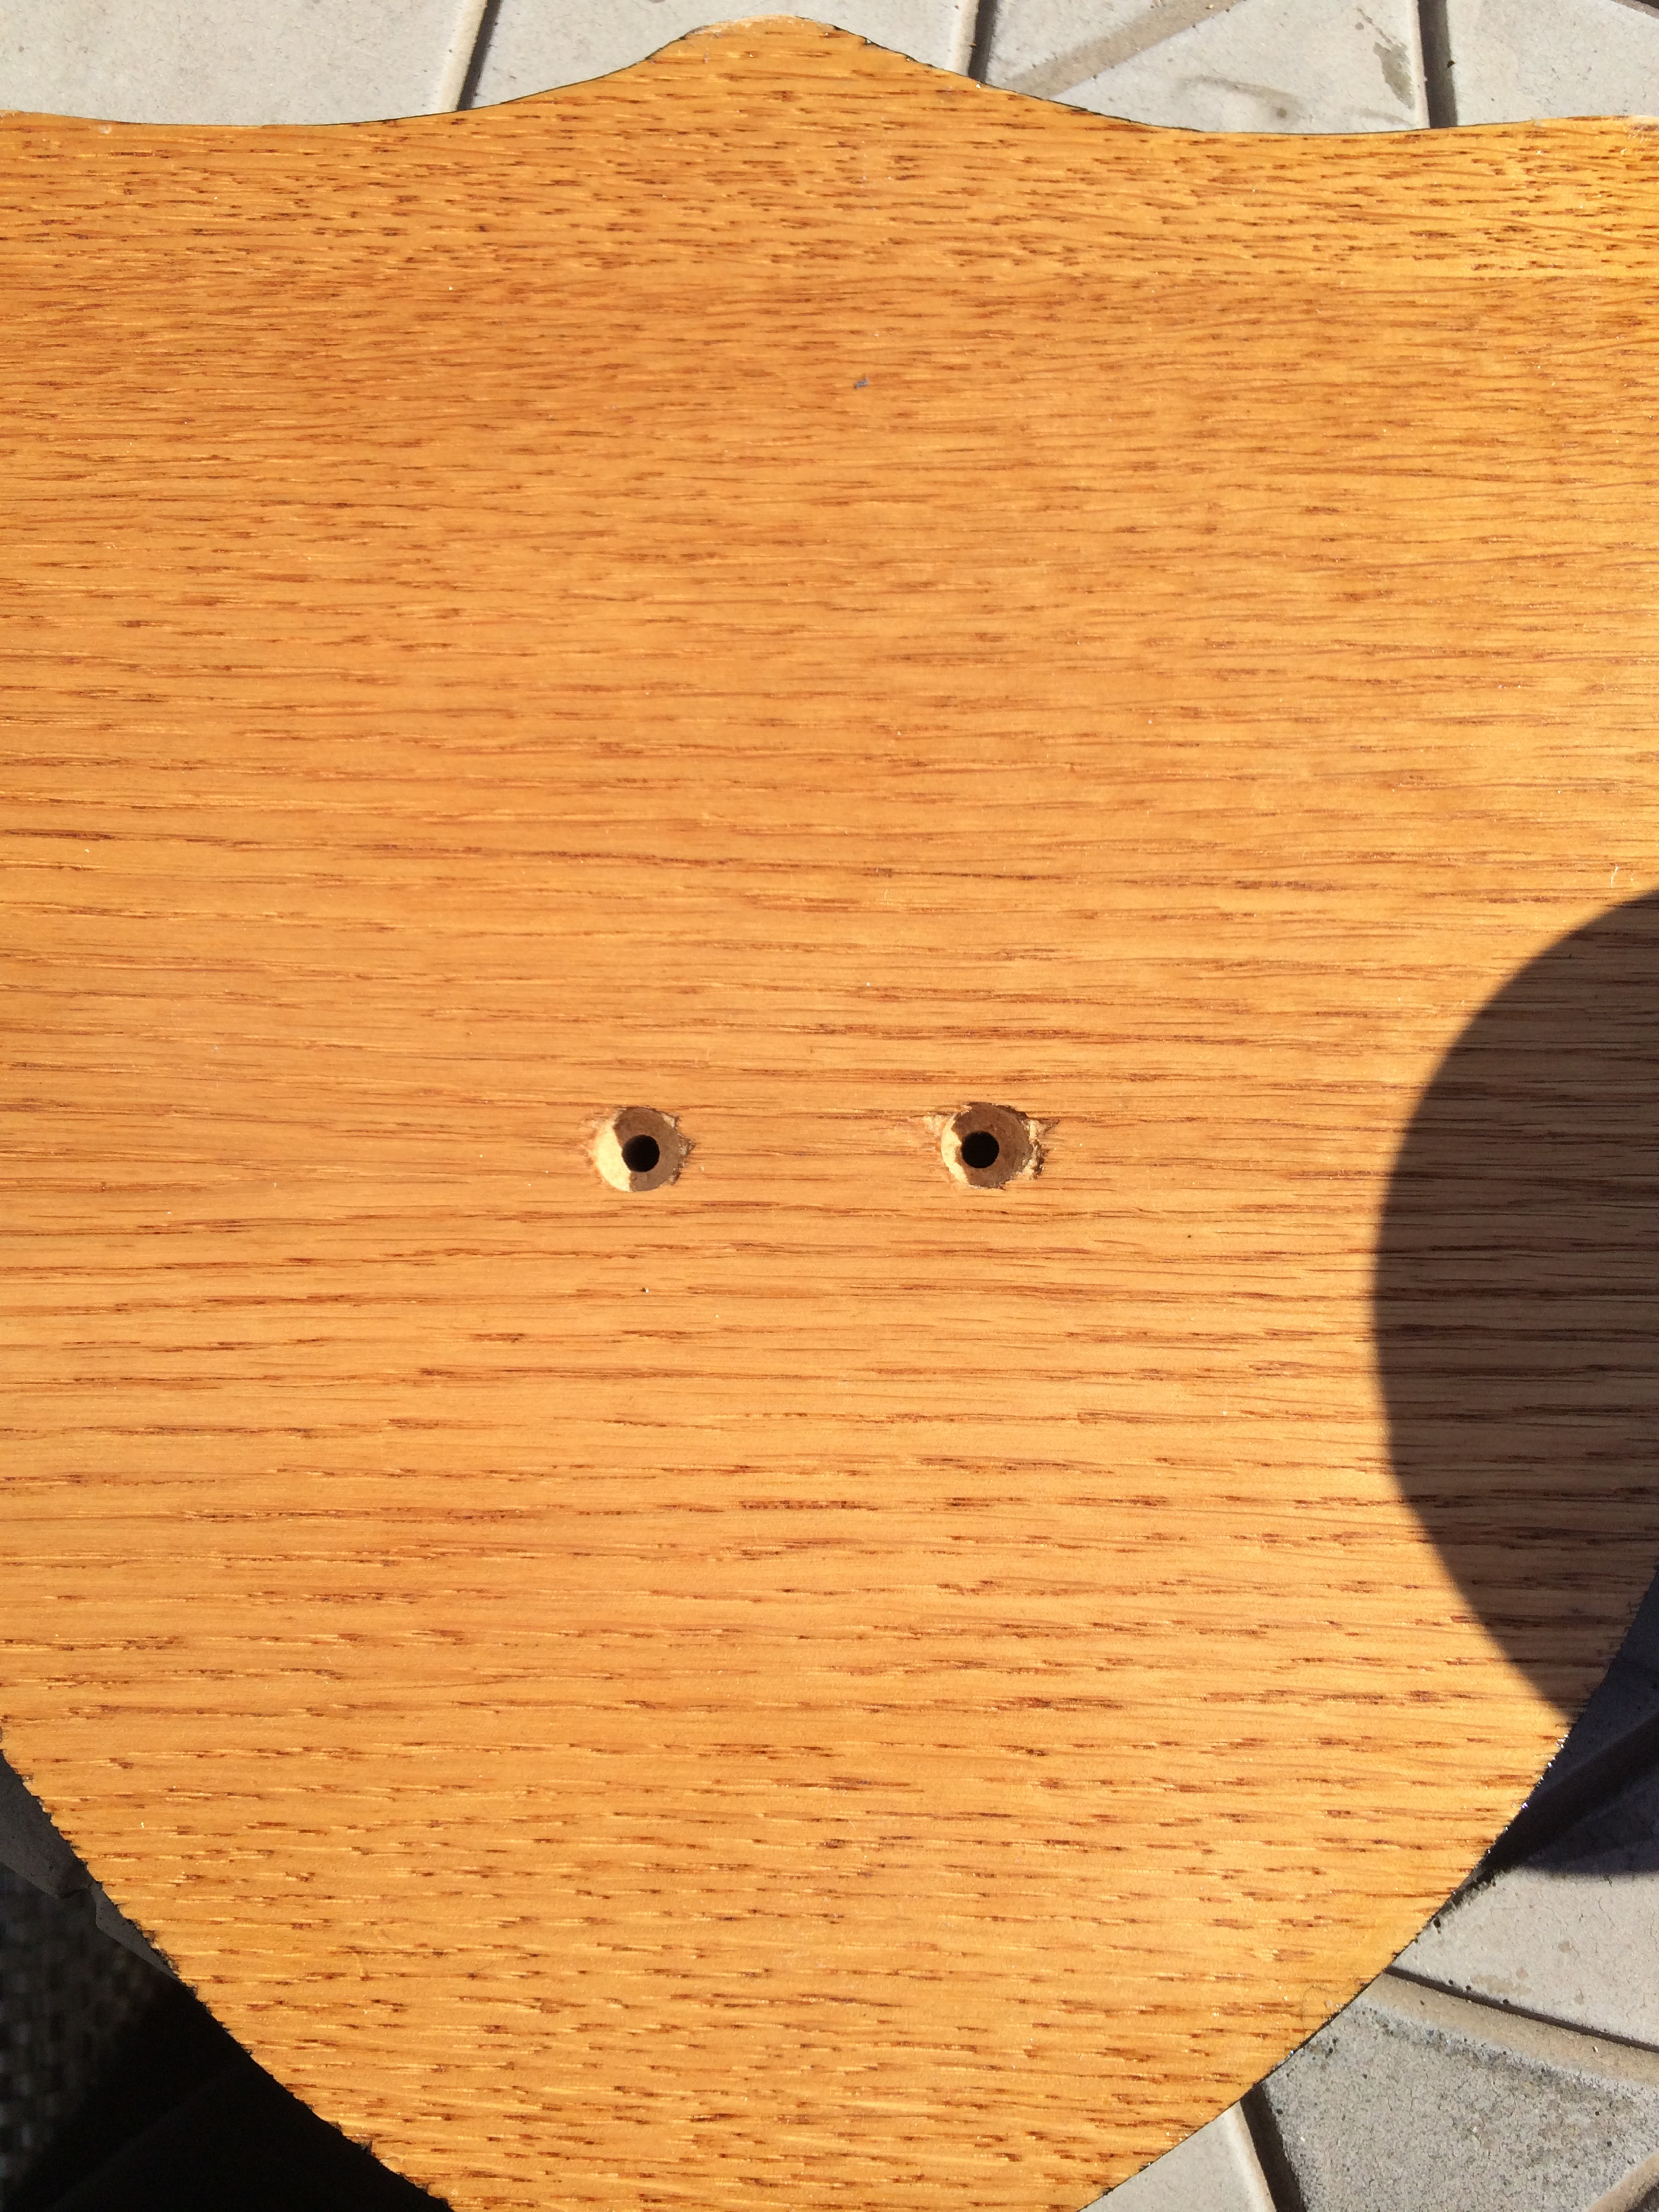
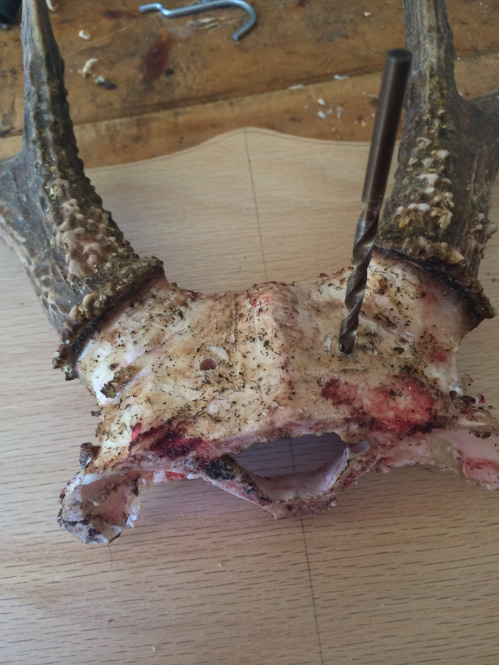
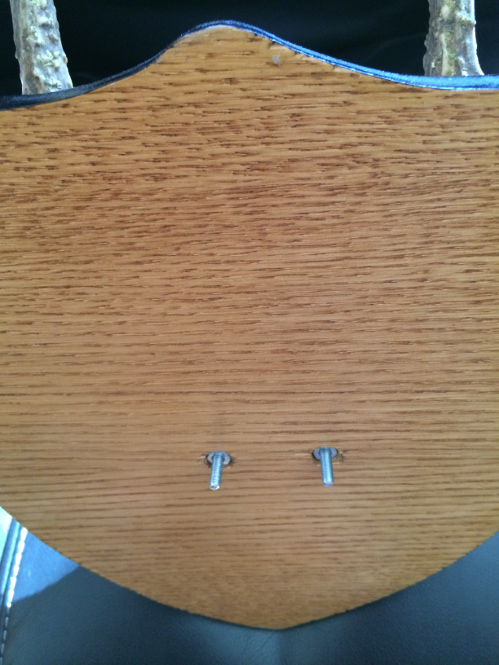
Here we will need a drill to make the holes in the antlers (skull) and your board mount. Drill through the skull of the antlers, position the antlers where you want them on your board mount and then drill into the board. Remove the antlers and complete drilling the holes through the board mount. Turn the board over and use a large bit to counter sink the board, for the nut on the screws you will be using. I use 3″ long screws with a lock washer and nut.
Step 3 – Finishing Your Deer Mount Board
Now, do a light sanding to clean up your board. Then I use an Oak stain (light) on the front and back of the board mount. Typically one coat on the back and 3 on the front, depending on how dark I want my mount. I then paint, or use a permanent marker to color the edges of the mount. If using paint do not get it on the top of your board mount or clean it right away. You can also use tape on the top side to protect the surface, but you will find a permanent marker works great for this. Colors I like are dark blue and black. After the stain and paint/marker are dry, I add 3 coats of Polyurethane (Clear Semi Gloss) to the top surface and 1 coat to the back surface.

Step 4 – Mounting Your Deer Antlers To A Board
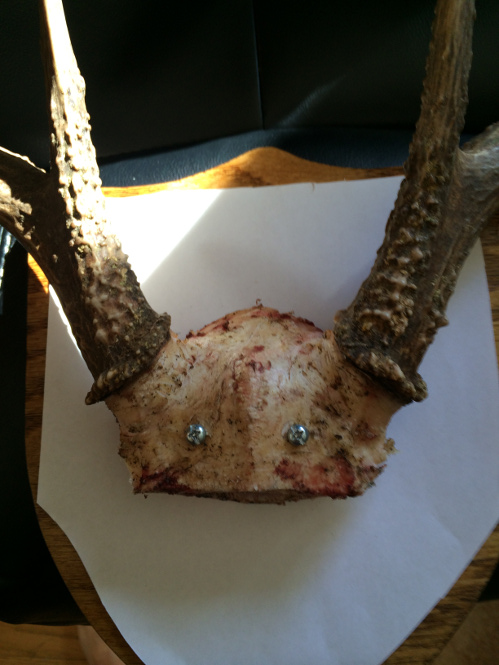
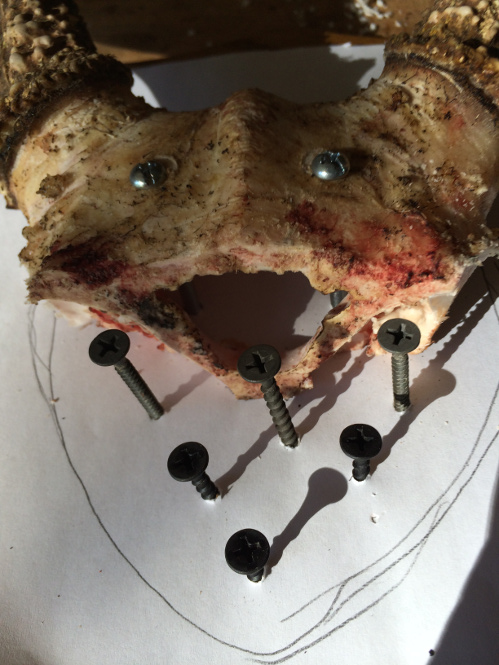
Now we need to mount your deer antlers and prep the board mount before creating the skull form. Here I add a sheet of paper between the Antlers and the board. This allows you to draw a pattern and absorb water from the sheet rock mud we are going to use. The paper will then cause a small gap that allows you to tuck the velvet in that we will be using. More later on this part. Once you have screwed your antlers down to the board mount you can make a small adjustment to align them. Also notice the nuts are buried into the counter sunk wholes on the back. The excess of the screws will be cut off flush later so they do not interfere when hanging on the wall.

Step 5 – Drawing a skull pattern For Your Deer Mount.
Now we draw our skull pattern and add sheet rock screws. The screws are only to help give strength to our sheet rock mud. I use 3 short (1/2″) screws in the front and 3 or 4 (1 1/2″) screws closer to the antlers.
Step 6 – Forming A Deer Antler Skull
Now we add the sheet rock mud. I fill in the deer skull cavity first and then apply mud to the top of the skull, the screws, and around the antlers, following our pattern as close as possible. Since sheet rock mud is easy to sand, there are no concerns for how it looks at this point. After adding the mud you will need to let this sit for 4 or 5 days until the mud dries. Once it dries it will crack and sink, so we will need to apply more mud, filling in these cracks and building up our form. I typically add 3 applications after the first one, with 8 hours between each, or until dry. I will show pictures of the first (wet) application and after the first drying time. The mud I use is “All Purpose Joint Compound”. A 3 pound bucket will make 2-3 mounts.


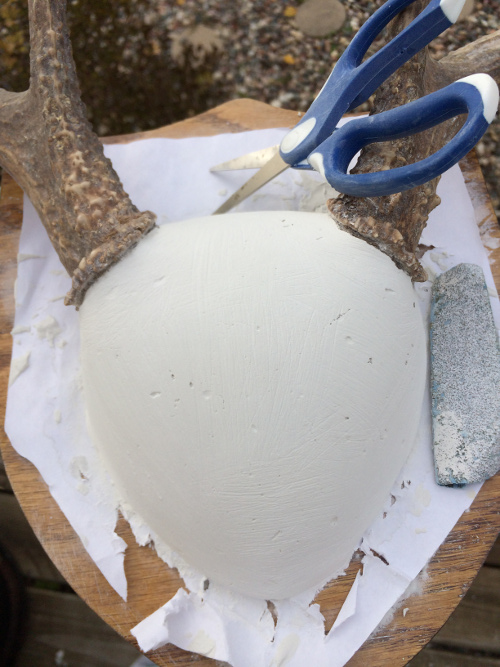
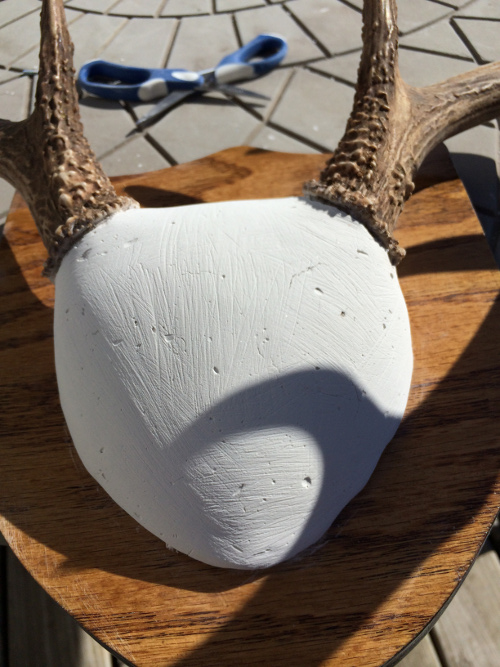
Step 7 – Sanding & Forming The Mud Deer Skull.
This is the easy part, but take your time and form the skull as you want it to look. I do not remove the paper yet, as I like to keep it to help protect the wood as I’m sanding. However, it will tear and start to pull away as you sand, this does not matter, just watch from hitting the board with your sandpaper. If you do scratch your board you can always apply more Polyurethane to fix it.
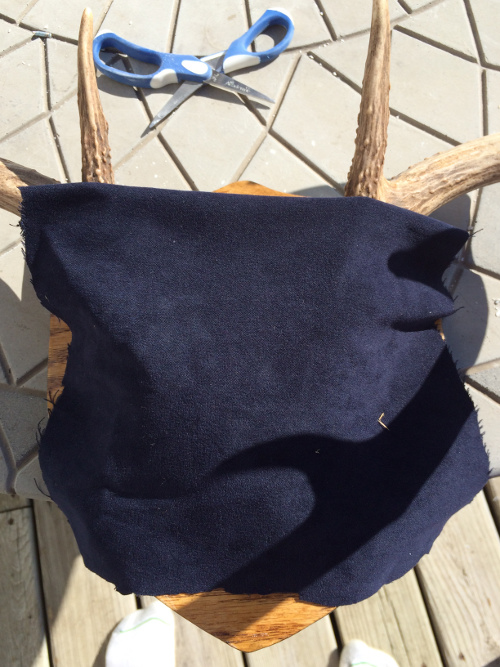
For sanding, I use a medium to coarse sandpaper and for cleaning around the antlers and under the mount small scissors. When cleaning and sanding around the antlers give extra room for folding the velvet under and gluing. I also use the scissors to clean and make extra room between the mount and the board for tucking the velvet under, which also will be glued. The final sanding results do not have to be perfect as your velvet will cover the scratches, but do a good job on the form as this will be noticed. Here is my final result after sanding. I also include a picture of the mount with the sandpaper and scissors for reference. At this time you can remove your paper and clean the mount up, removing any dust from the Sheetrock mud. We want a clean surface to glue the velvet to.

Step 8 – Applying Velvet To A Deer Mount
First visit your fabric store and buy a half of yard of Velvet. Color is up to you, but I have used both Navy Blue and Dark Green and they both look great. For $5 you will get enough to do several mounts.
Take and cut your velvet into a piece of 9″ x 9″ and place this over your mount. Holding the velvet down in the middle of the mount press it down the sides and mark around your mount with a pin. Once you have this traced cut it, leaving 1/8″ extra, as this will be tucked under the sheet rock at the end. Now trace around your antlers and do the same cut, leaving 1/8″ to fold under and around the antlers. Make sure your velvet wraps around the back side of the antlers, if it’s short, you can glue a small pieced of velvet there. No one will notice it and I have done this to a few myself. Below is a picture of the area cleaned between the mud and board (for tucking the velvet under), a picture of the mount ready for adding the velvet, and a picture with the velvet laid over it.

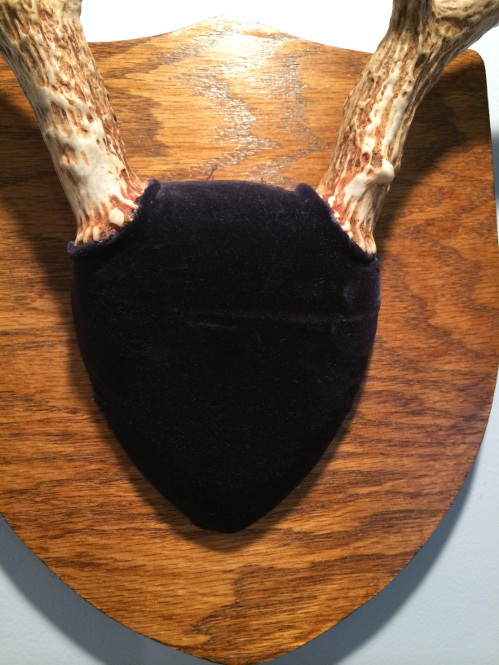
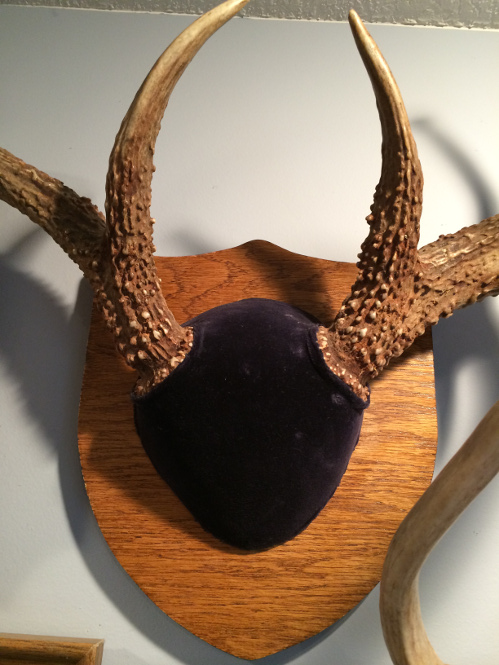
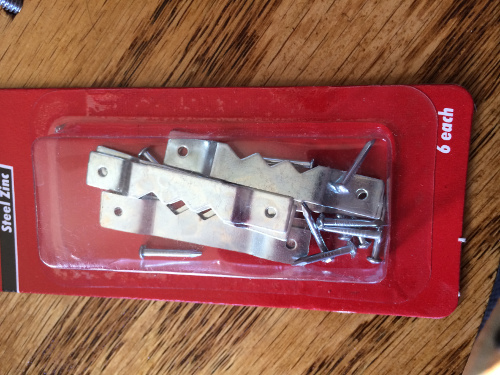
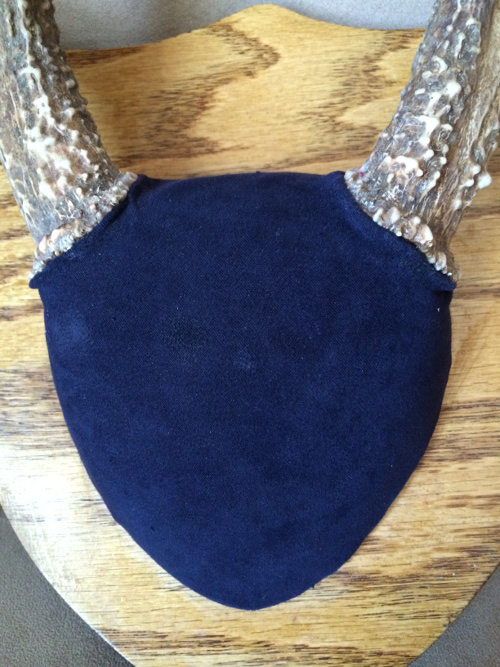
Now place your trimmed velvet over your mount and start adding glue in the center of the skull, 2″ down from the antlers. Use your finger to smooth the glue over the mud, then wipe them on a wet cloth then dry them. Now press the velvet down. Continue this process working down each front side. Do not glue under the mud, in the area we cleaned for tucking the velvet, yet! Once you have completed the glue up to the antlers start adding the glue under the front of the mud, between the mud and the board. You can add a lot as this will not be seen. Using a dual pointer start pushing the velvet under the mud until the ends are hidden. Let this dry for 30 minutes and then start working done one side of the antlers. After you have completed one side let this dry for 30 minutes, then complete the other side. When you are done your velvet should be tucked between the mud and the mounting board for the entire circumference. Also the velvet should be folded under and around your antlers. Now let everything dry for 1 hour and then add your Mount Hanger. See hangers I use and the completed Antler Deer Mount below.
