
Step by Step Guide on Making A Deer Rattle Bag
There are just 3 easy steps in making your own Whitetail Rattle Bag, all which can be done within an hour.
Step 1 – Choosing and Cutting The Dowel Rods
The first step is to purchase a couple of Dowel Rods. I had several pieces that I have saved over the years, which may be your case as well. I also used parts from an old kitchen stool and dining room table chair, which I took both the small oak dowel rods and the legs to cut the square pieces from.
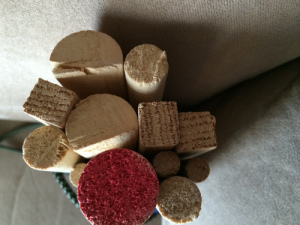
Here is the list of Dowels I used, diameter size, whole/halves/squares, their lengths, type of wood, how many. In this case I cut them all to 7.5″, but you can use different lengths.
1″ Diameter, Whole, 7.5″, softwood (not Oak), 1.
1″ Diameter, Halves, 7.5″, softwood (not Oak), 2.
5/8″ Diameter, Whole, 7.5″, softwood (not Oak), 3.
5/16″ Diameter, Whole, 7.5″, Oak, 3
1/2 x 1/2 Square, Square, 7.5″, Oak, 3.
Step 2 – Making the Rattle Bag
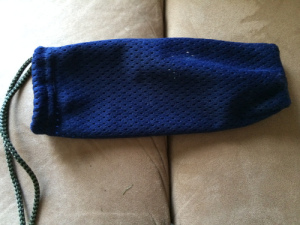
The second step is to use a piece of material that is strong and durable. I used an old hockey practice jersey. Cut the material to make a 9″ long and 3″ diameter bag. At the top of the bag sew an open sleeve so you can insert a cord for closing the bag. I used an old cord, with a closing clip on it, that I had stored away for future use and it works great.
Step 3 – The Final Assembly For The Deer Rattle
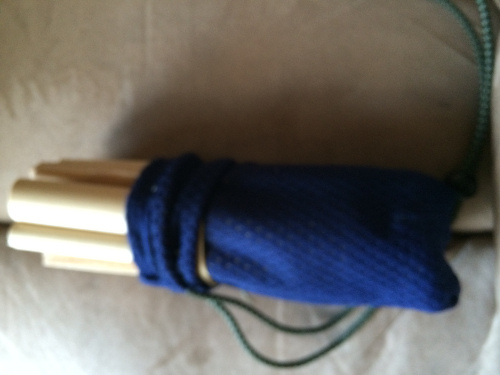
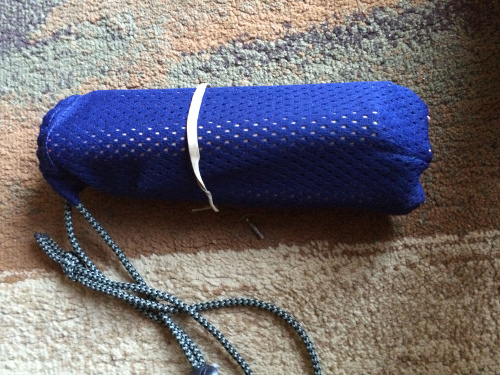
The third and final step is the assembly of your rattle bag, which is the same size as a purchased one and works just as well. I have 3 of these rattle bags, one for myself and one for each of my sons, and all have brought in bucks, which is the ultimate challenge correct? But, also knowing you made it adds just that much more satisfaction. Now you are ready to put your dowel rods into the bag and add a strong rubber-band around the outside to help keep the dowels tight.
-

- Rattle Bag

